 Financial Operations (FinOps)
 Autoscaling applications
 Amazon Web Services
 Big data
 Container infrastructure
 Microsoft Azure
 Reserved commitment management
 Cloud services for MSPs
 Google Cloud
 Spot Overview
 About NetApp
 Elastigroup
 Ocean
Ocean Ocean CD
 Eco
Eco CloudCheckr
 Apache Cassandra
 Spot Security
 Case Studies
 Resource Center
 Documentation
 News
News Service Status
 CloudOps hub
 2023 State of CloudOps
 Our Story
 The Spot Team
 Contact Us
 Our Values
 Careers
 Reading Time: 6 minutes
Introduction
Rancher 2.x is an open source product that simplifies the deployment and management of Kubernetes clusters. Rancher can provision Kubernetes from a hosted cloud provider or an on-prem Datacenter, provision compute nodes and deploy Kubernetes on them, or inherit existing Kubernetes clusters, while managing them from the same interface. Adopting Rancher simplifies user management, security policy administration, version upgrades, backups, recovery and more.
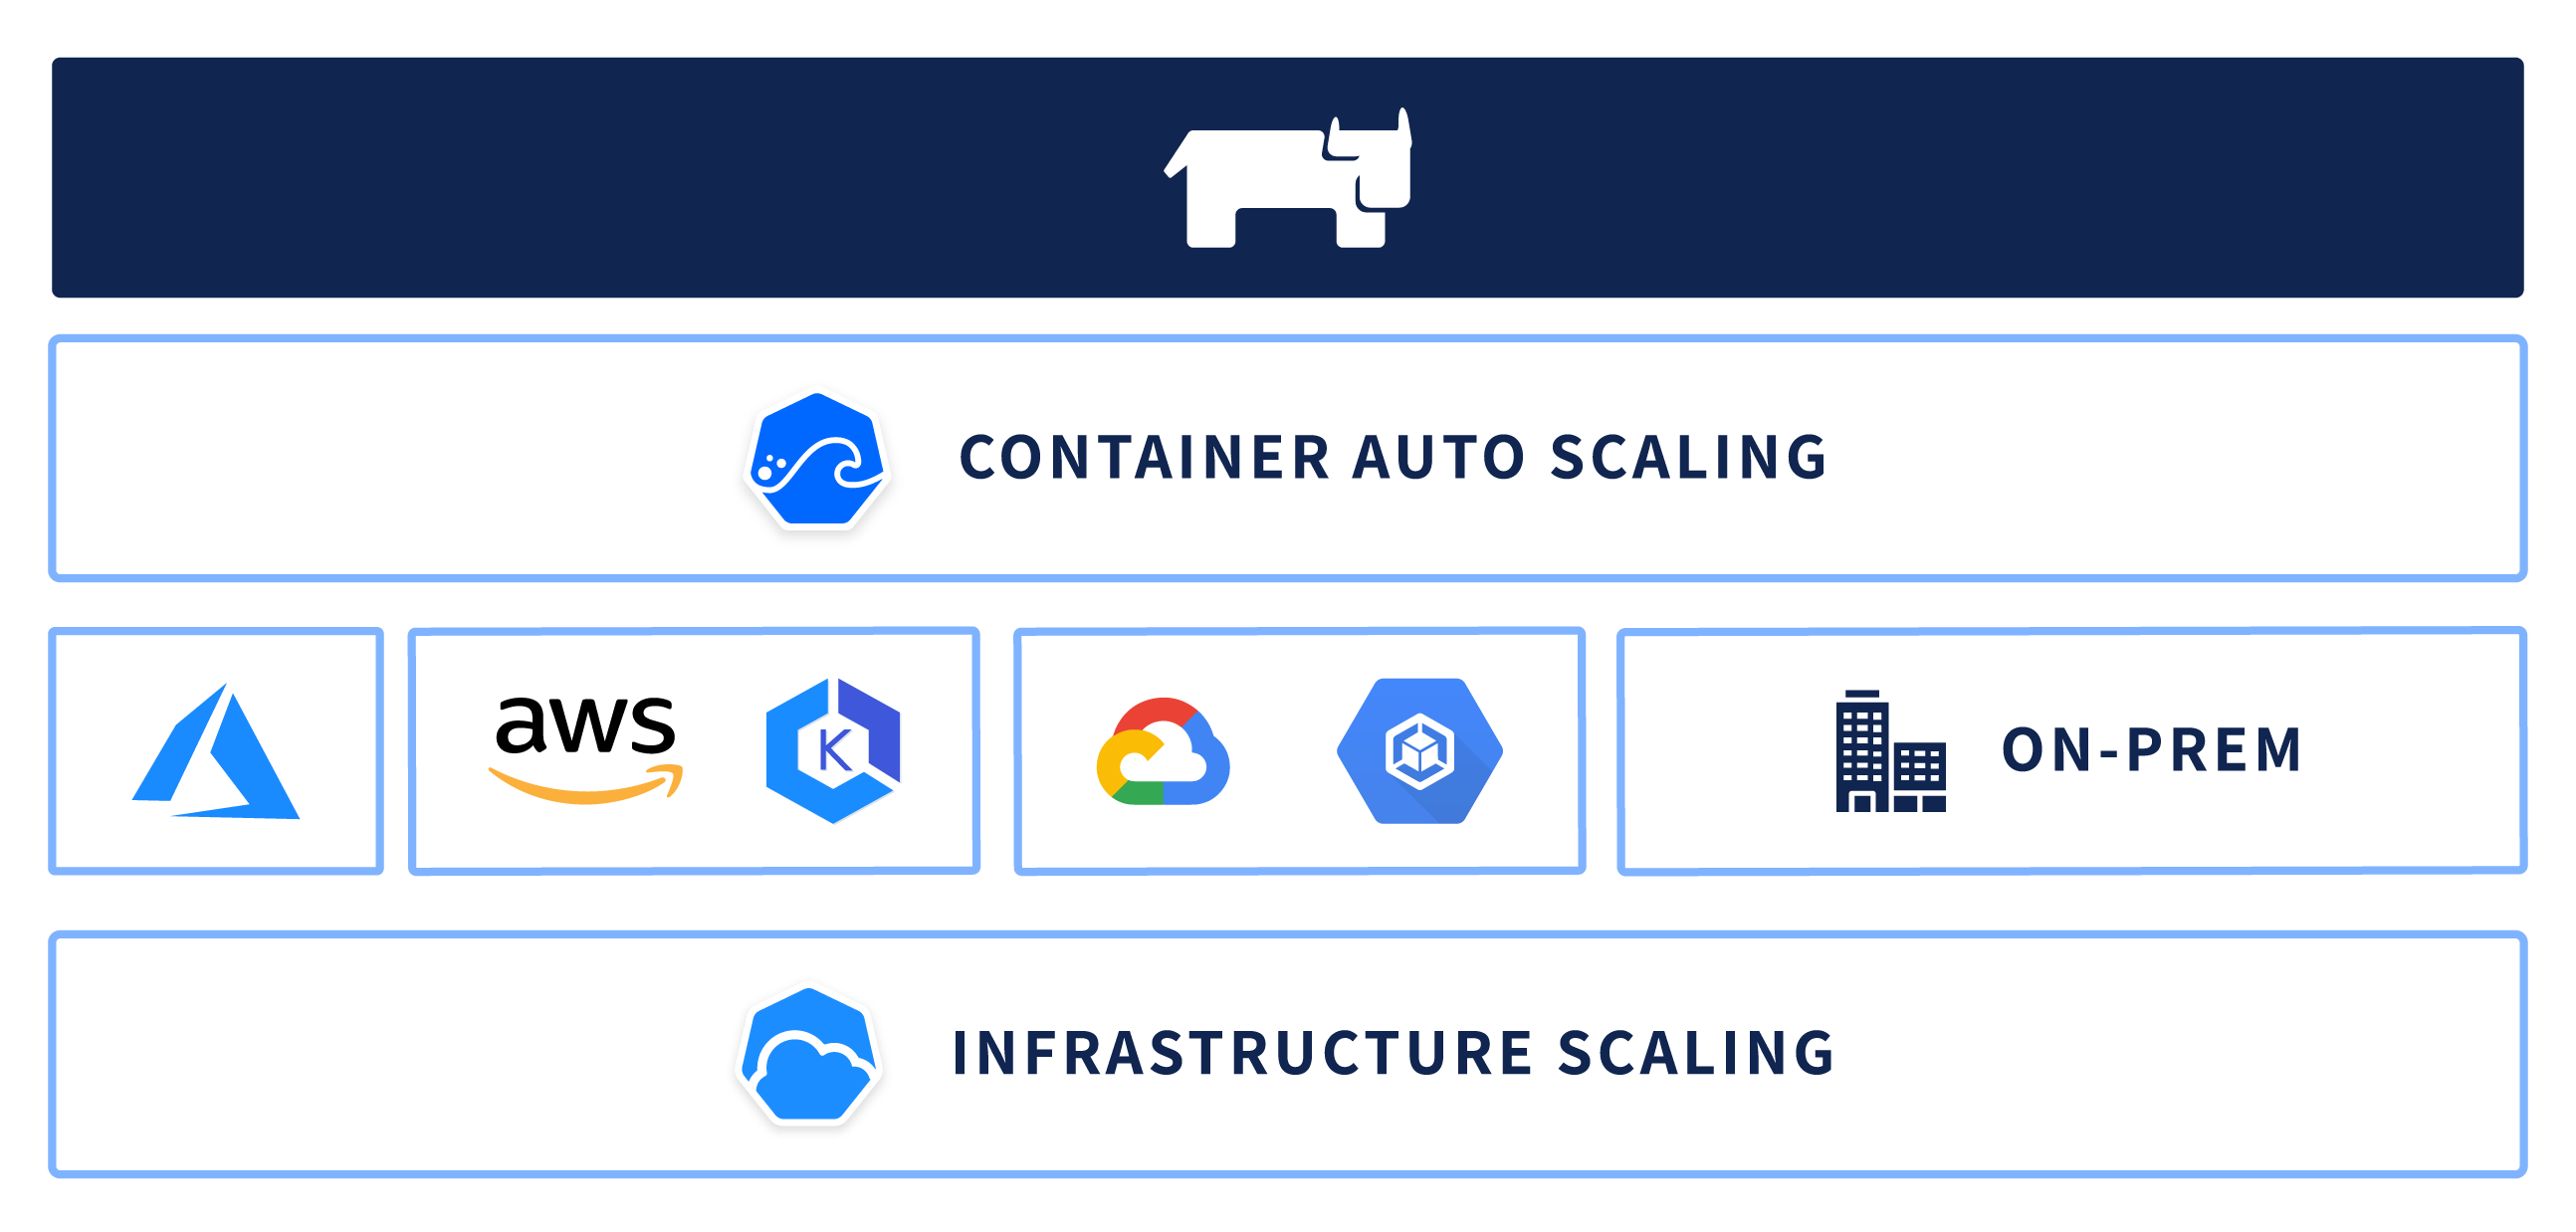
Like Rancher, Spot Ocean also supports every Kubernetes cluster running with the cloud providers. Whether a preferred Cloud Provider is chosen, Vanilla Kubernetes or a managed service like EKS or GKE, Spot Ocean will dynamically handle the provisioning of the most optimal infrastructure.
Spot Ocean is the serverless containers platform, and it’s the most efficient way to run Kubernetes clusters in the Cloud. On top of any Kubernetes environment, Spot Ocean abstracts the underlying infrastructure by dynamically selecting compute resources that fit Pods and Containers resource requirements, and in addition to that, it increases the cluster’s node utilization, thus dramatically lowering operational cloud costs.
If you haven’t heard about Spot Ocean yet, we recommend checking out our Ocean introduction for a deeper dive.
In this blog post, we will demonstrate how to run a cost-efficient Rancher cluster over Spot Ocean.
Architecture – System Process Flow
Before we get started, let’s review the main components required in order to run a Rancher cluster over Spot Ocean:
- A Rancher Server includes all of the software components used to manage the entire Rancher deployment and the Rancher server API. One Rancher server installation can manage hundreds of Kubernetes clusters.
- Control-plane and etcd nodes run the Kubernetes etcd database and the Kubernetes API. A single node can be used for both roles. For a simple setup, it’s sufficient to run only one node, while for production environments it is recommended to run it on two or three nodes for redundancy, thus in order to assure high availability. This node will run as an independent On-demand instance.
- Worker nodes are the agents in the Rancher deployment which run the containers and pods. In this setup, the worker nodes will be custom nodes that are launched by Spot Ocean and scaled according to the pods’ requirements.
Ocean Kubernetes controller is a Kubernetes deployment installed inside the cluster that is responsible for collecting metrics and events and pushing them via a one way secured link to Spot’s API. The collected metrics will be used by the Spot Ocean Autoscaler in order to adjust the infrastructure capacity to meet actual container requirements. The adjustments are reflected in optimizing the type, size, and distribution of instances, thus allowing to achieve a higher resource allocation and utilization of the Kubernetes cluster.
Step-by-step Tutorial
Before we begin, please validate that you have a Rancher server and a Kubernetes cluster installed on AWS, with at least one etcd and control plane node. Use this Rancher quick-start guide to set it up by using a Terraform template.
Make sure to have the following generated from your Spot console:
- Open MyAccount and save your account Id aside
- Generate a Programmatic User and keep its API token
Step 1 – Modify your Rancher Cloud Cluster
Configure your Rancher cluster to add custom hosts:
Edit your Rancher cluster. Under Cluster Options, set Cloud Provider: Custom.
Under Customize Node Run Command, define Node Options: Worker.
Save aside the registration command which will be later used to build the instance userdata.
It should look like the following:
sudo docker run -d --privileged --restart=unless-stopped --net=host -v /etc/kubernetes:/etc/kubernetes -v /var/run:/var/run rancher/rancher-agent:v2.2.4 --server https://RancherServerIP --token XXXX --ca-checksum XXXX --worker

Step 2 – Create an Ocean cluster for Rancher worker nodes
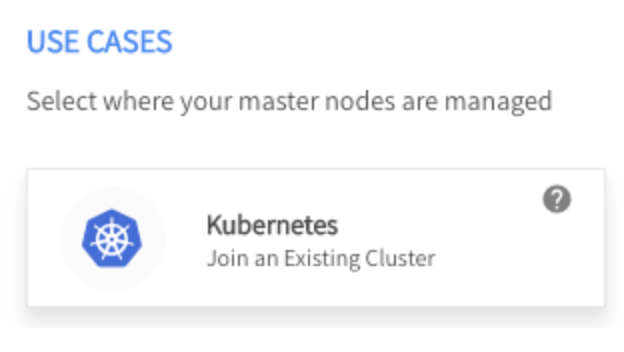
On the left-hand menu, under Ocean Cloud Clusters, click Create and choose Kubernetes – Join an existing cluster, linked to your Rancher cluster.
First off, provide a cluster name (the cluster Identifier will be set automatically based on the cluster name provided), then select the region in which the cluster resides on. Choose to Import the cluster configuration from the existing Rancher node, running the cluster’s control plane. Next off, Spot Ocean will import all of the networking configurations – VPC, subnets, security groups and more. 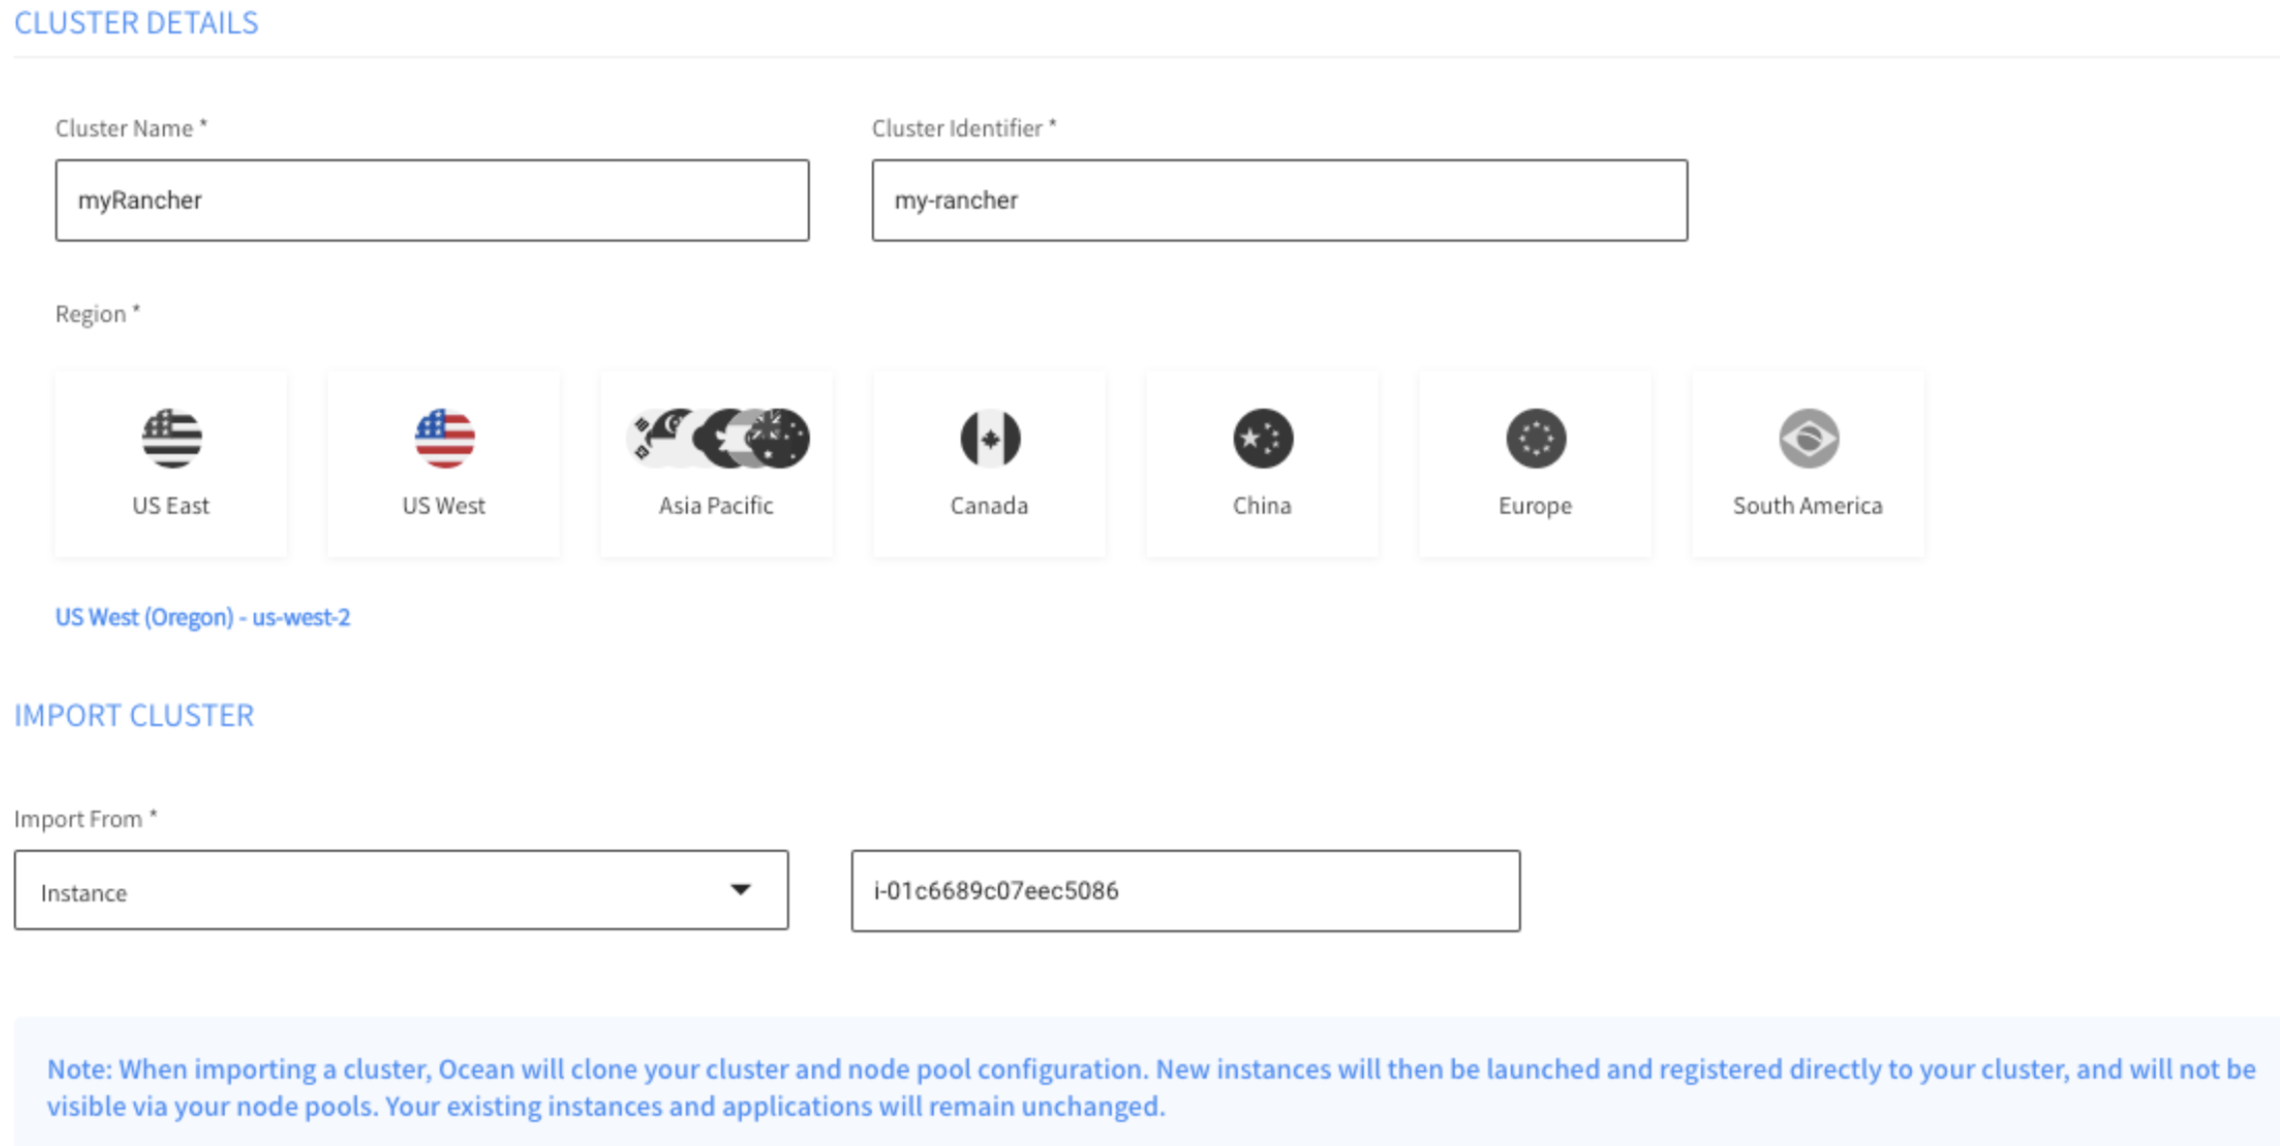
Under compute tab, please modify the following fields:Replace the image with the one running RancherOS. This would guarantee the instance is running a supported version of docker. For a full list of the supported OS, please refer to rancher/os  Define the UserData script that will be executed once the instance is initially booted, change the docker version to a supported version and register the instance as a custom node in the Rancher cluster. It will also label the node with its instance Id, so Spot Ocean will be able to identify it later.Please modify the cloud-config script (replace the rancher url, token and checksum with those from the registration command you got in step 1) and insert it to the Ocean User Data:


Leave the rest with the default values and click Next.
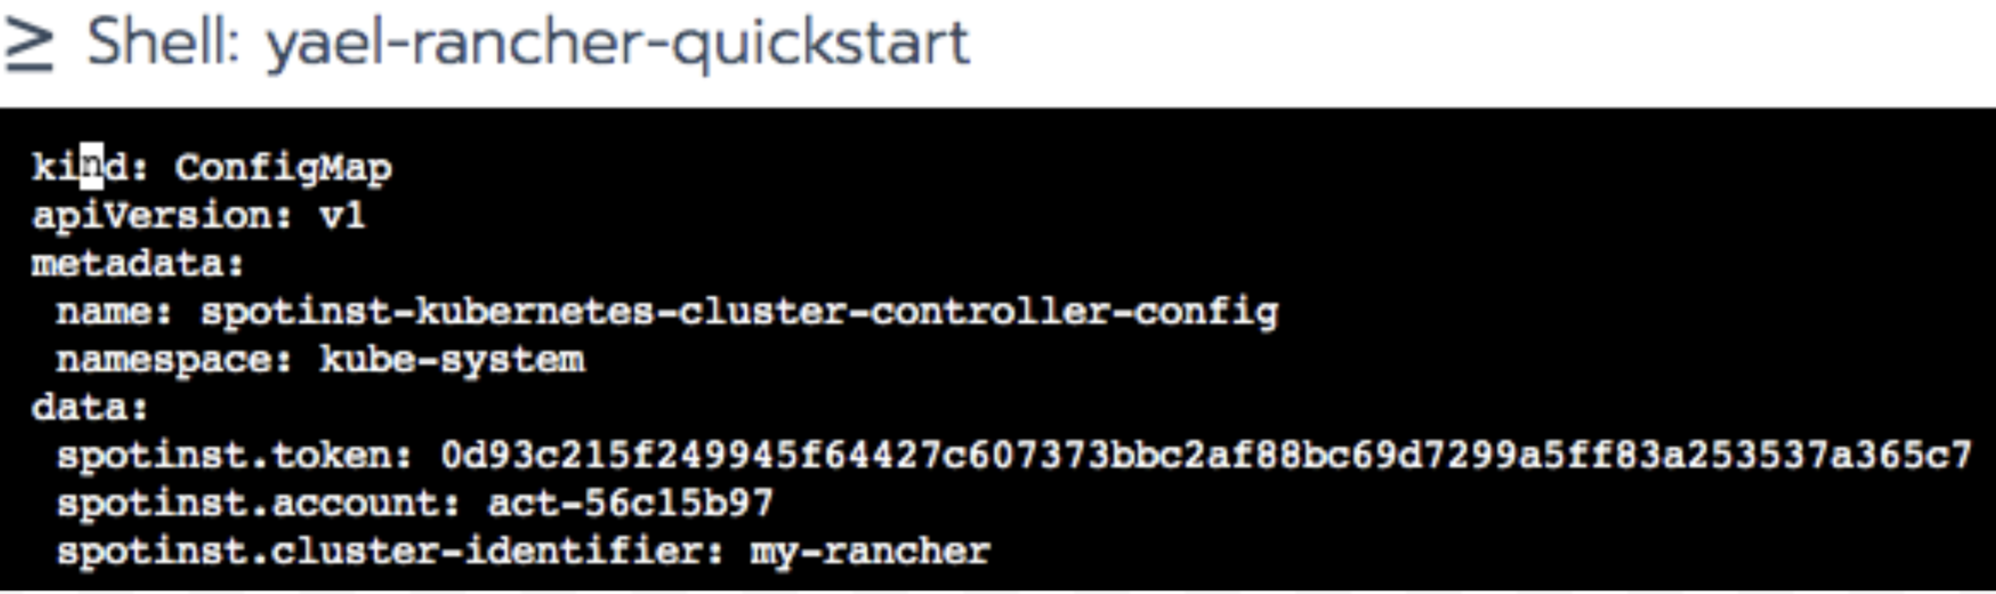
Run the spotinst controller in your cluster using kubectl –4.1 Create a yaml file configMap.yaml with the following parameters.
Make sure to replace the token, account, and cluster-identifier with your values.
kind: ConfigMap
apiVersion: v1
metadata:
 name: spotinst-kubernetes-cluster-controller-config
 namespace: kube-system
data:
 spotinst.token: XXXXXX
 spotinst.account: XXXXX
 spotinst.cluster-identifier: my-rancher
4.2. Load the parameters into the cluster config-
kubectl apply -f configMap.yaml

4.3. Install the controller and its dependencies:
kubectl apply -f https://s3.amazonaws.com/spotinst-public/integrations/kubernetes/cluster-controller/spotinst-kubernetes-cluster-controller-ga.yaml

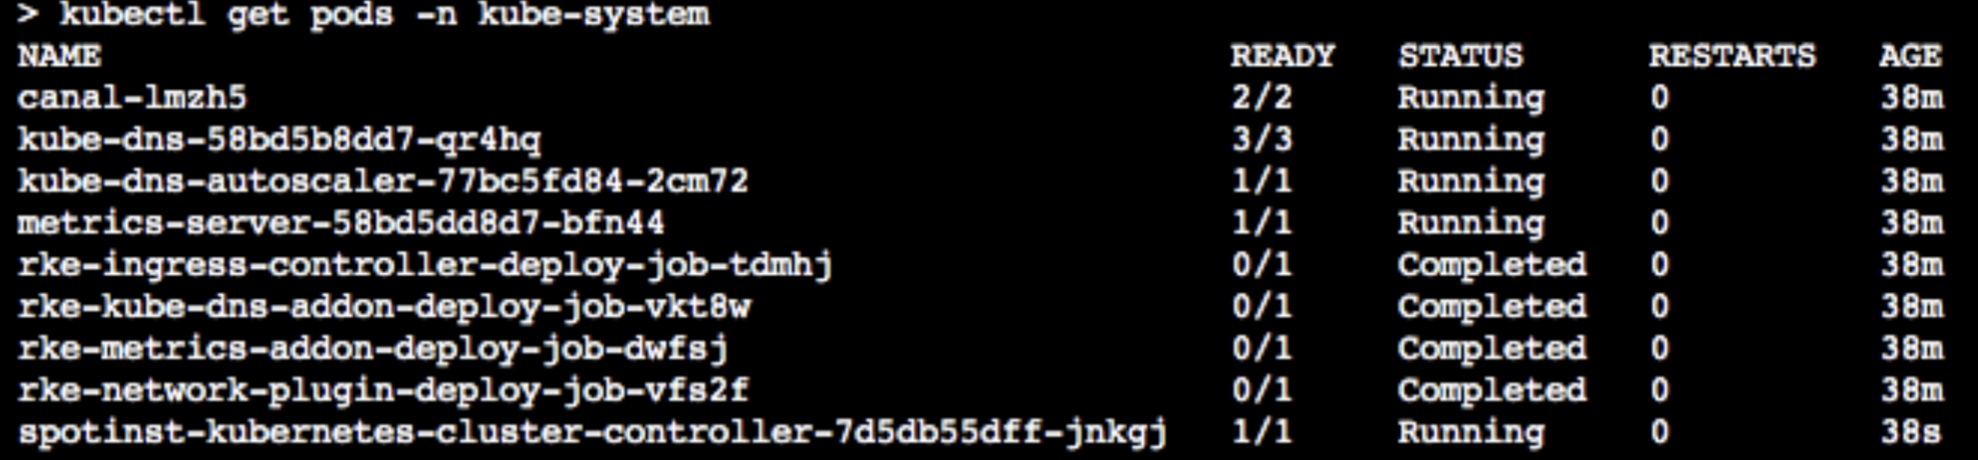
4.4. Confirm the spotinst-kubernetes-cluster-controller pod is running:
Kubectl get pods -n kube-system
Browse back to Spot Ocean’s creation wizard. Click Next and Create the cluster
You’re all set! Spot Ocean will now optimize and validate that the Rancher cluster is running in the most cost-efficient way.
Spot Ocean nodes will now be listed in the Rancher console under Nodes tab:

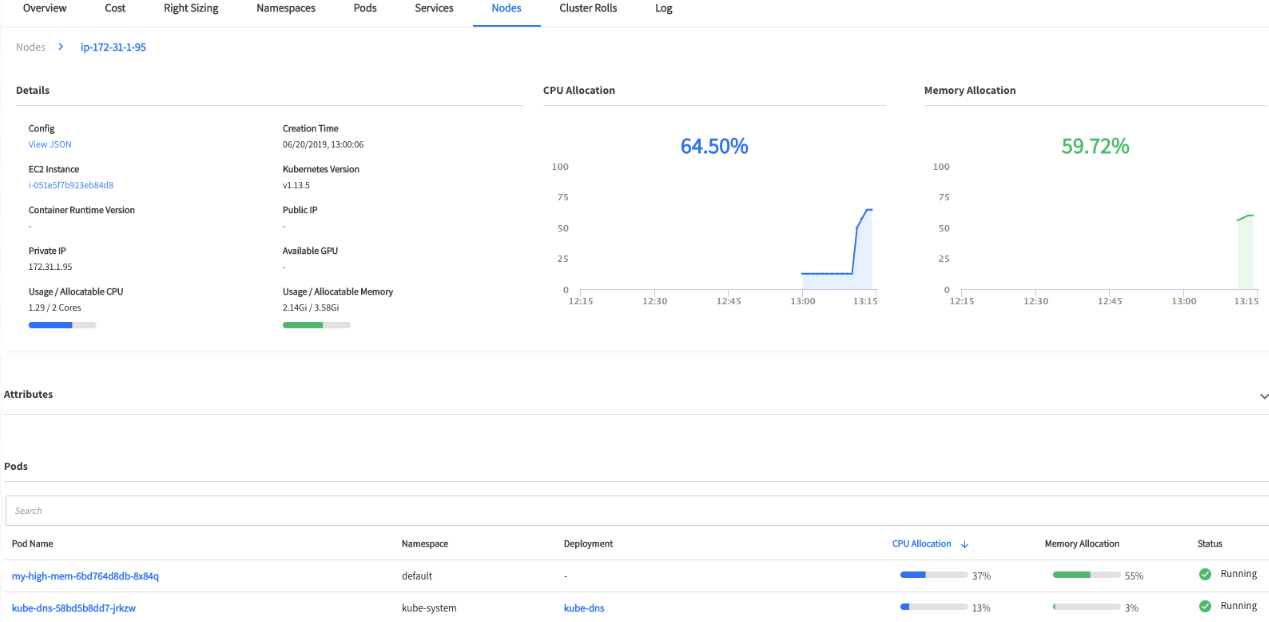
Review the nodes
Spot Ocean provides an interface for easier management and deeper visibility of the Kubernetes cluster.
The Spot Ocean dashboard provides an easier way to review node statistics and validate which pods are running in realtime, resource usage history and Kubernetes attributes (when applicable).
 That’s it! Now that the Rancher cluster nodes are managed by Spot Ocean, it’s possible to deploy pods and applications from the Rancher shell, or directly from the Spot Ocean UI, by using the ‘Run Workloads’ feature.
Deploy an application with ‘Run Workloads’
Now that the Rancher cluster is set up, let’s deploy an application to it. In order to deploy the application from the Spot Ocean console, we will use the integrated ‘Run Workloads’ feature. Run Workloads allows creating Kubernetes entities such as Deployments, Pods, and DaemonSets.
From Ocean Actions choose ‘Run Workloads’. For this tutorial we will create a deployment using a Form, but please note that it’s also possible by uploading a yaml file with the configuration.
Configure the following in the ‘Run Workloads’ form:
- Namespace – default
- Kind – Deployment
- Workload Name: hello-world
- Container Image: gcr.io/hello-minikube-zero-install/hello-node
- Replicas: 1
 Leave the rest empty and click on Deploy.
View the running deployment under Namespaces:
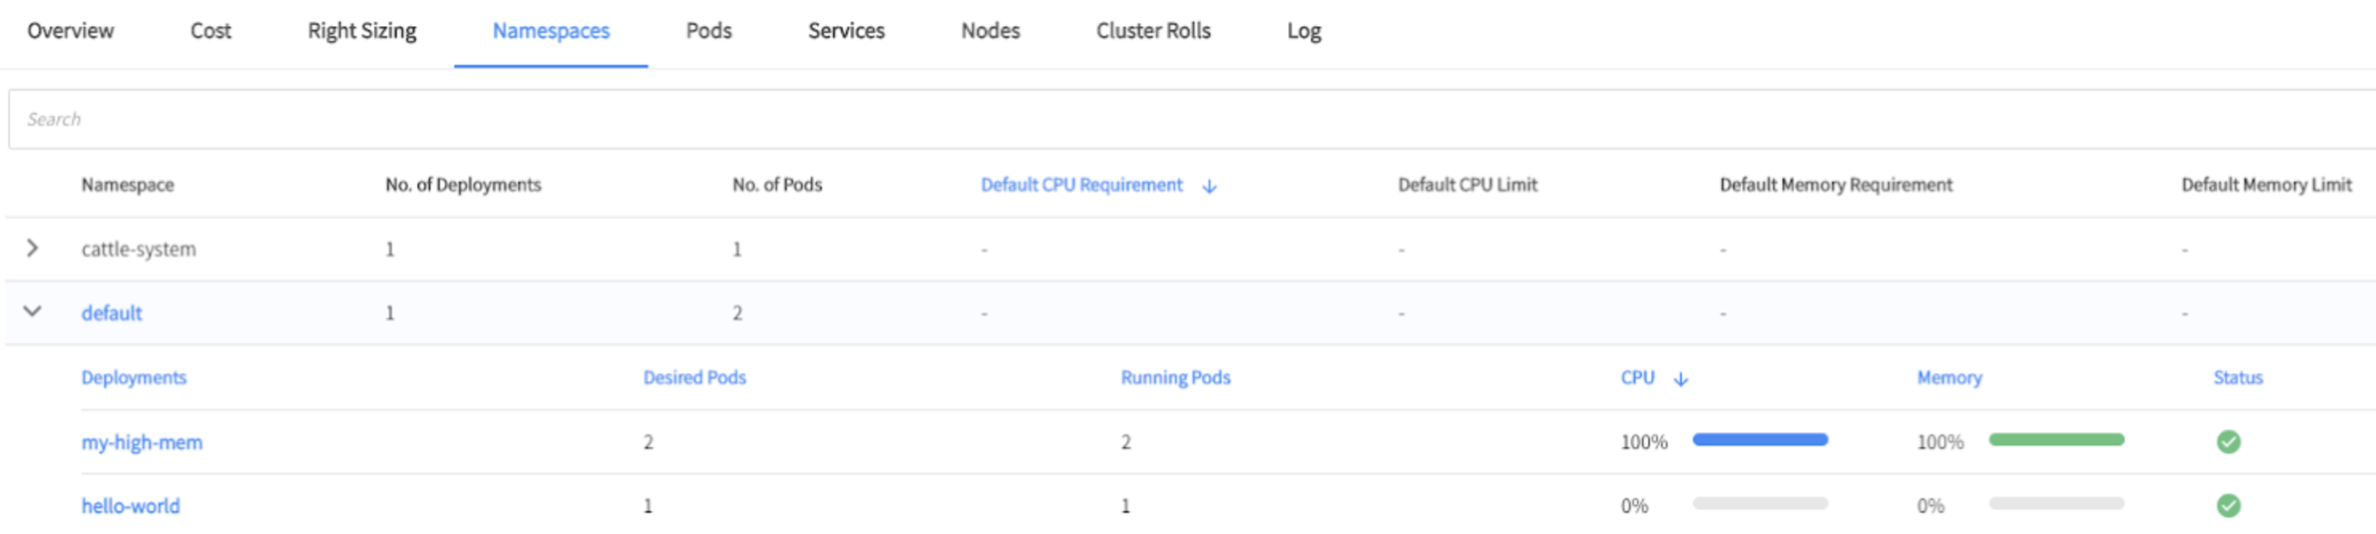
Drill down to get the running pod details by clicking on the highlighted namespace:

Summary
In this blog post, we have integrated Spot Ocean with Rancher. Rancher helps to deploy clusters quickly and easily on every cloud provider, with the option of managing the Kubernetes control plane from a single Interface. Spot Ocean, on top of Rancher, optimizes resource utilization, reduces cloud-compute costs and minimizes management overhead.
Sounds interesting? Try it for yourself!
Continue reading about Ocean in our blog or reach out to us directly if you have any questions!